
Since 2017, I have admired Liz Steel and her art. She was a Sydney based architect who ended up leaving her career to make art and (my favorite!) to teach other artists. There was a Sketchbook Skool class with her in it and she did a teacup demonstration in watercolor. I was so excited! Liz did things a little differently than I had ever seen before and I was eager to learn new techniques and use new materials to master sketching my much-loved morning cup of tea.
Before this I had never:
-Used a fountain pen with permanent ink ( didn’t even think that existed for fountain pens!)
-Drawn/sketched/painted the same thing over and over and over.
-Been able to confidently deal with the handle of the teacup.
-Been able to deal with those pesky ellipses!
-Used a water-soluable pencil (watercolor pencil) for the initial drawing.
-Seen a Lamy Joy pen.
Since that small demonstration and reading her blog I now regularly sketch with all the tools above and practice the techniques I learned.
Then Liz announced she was going to do a class specifically about teacups and sketching them! This was two of my favorite things together in a course! The introductory price was also very affordable at only $49 US! I was so excited to take this workshop!
While counting down the weeks and days waiting for it to start I prepped all my supplies and even got a new teacup. (I had wanted a Wedgwood Wild Stawberry peony-shaped cup for a while and there was one on E-Bay for $19! I’m sad that china is worth a fraction of the price it used to be but its a buyer’s market so if you love it it’s a great time right now!) Liz had us post pictures and stories of our teacups and teacup collections. I just loved looking at everyone’s cups and hearing their stories!
Then I started!

After some shadow studies (those would come back in a big way later) we went on to measuring (not fun for this girl) then pattern study which I loved! I took my most favorite and complicated cup and saucer (the Brambly Hedge) and really studied everything. So fun. Did this one on a road trip to Ikea to get “adult” furniture for our daughter!
Then on to doing different mixes to find the color of my tea (see color swatches below), and learning to paint the gold rims and handles (quinacridone gold with touches of burnt umber in the wet paint).

Then it was trying different supplies to see what worked best for a pattern. Here I tried different brushes, watercolor, and watercolor pencils. This was so so fun and I did it on a small road trip hubs and I took to go to a restaurant an hour-and-a-half away for our anniversary. (We were traveling a lot this summer.)

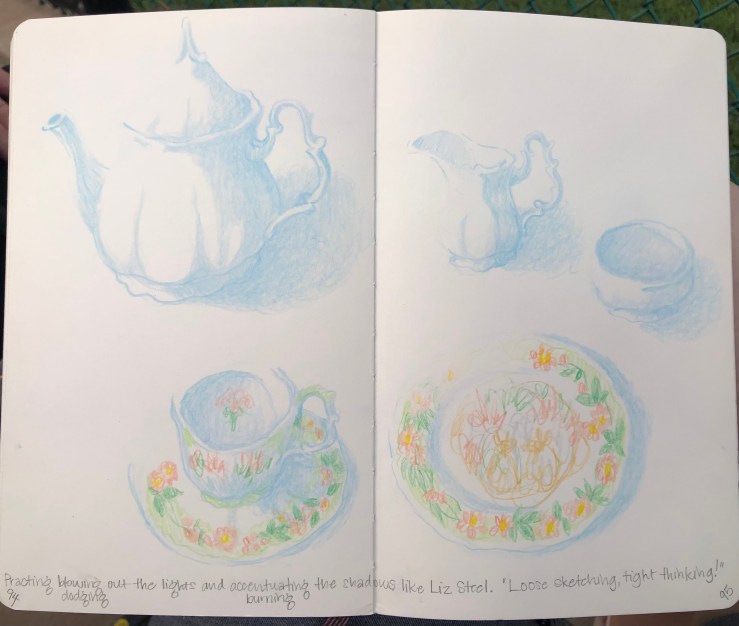
After the pattern practice we delved into adding shadows which was really scary because you are afraid to mess up all your hard work you did making the pattern!

Shadow with watercolor pencils too. One of the things I like about Liz’s technique is how she leaves the places where the light hits the strongest completely white, even washed out, and she makes the shadows really dark. I love how this looks! I practiced that here:
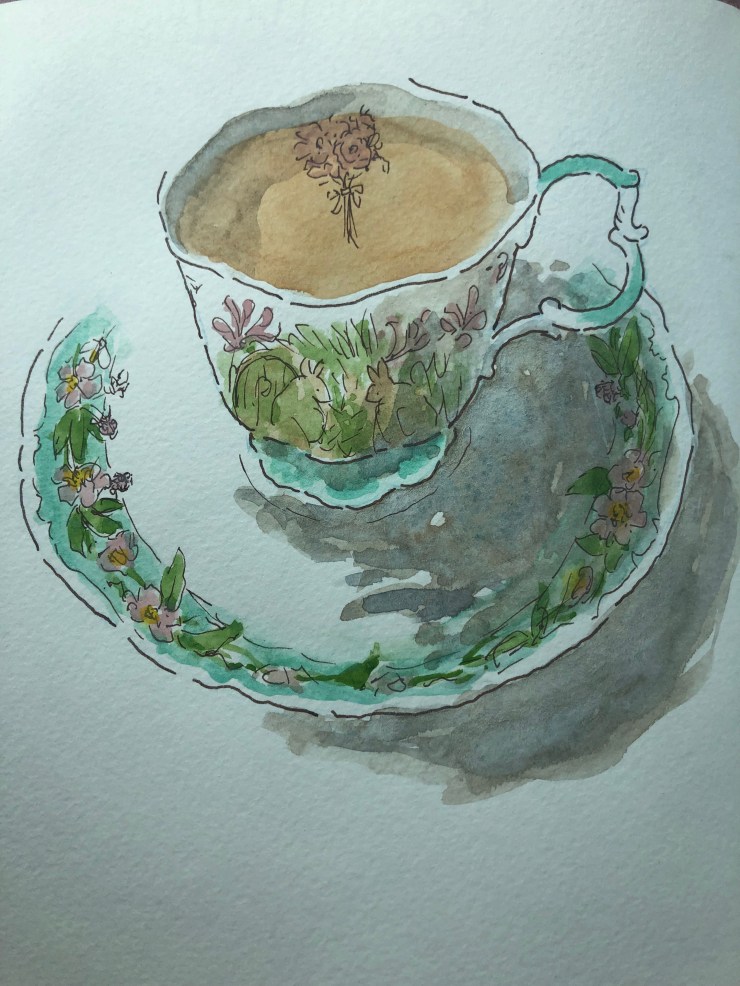
Finally, it was time to put it all together. We practiced a lot and tried to keep details to a minimum to make painterly works.

We also tried doing watercolor pencil techniques for detail.

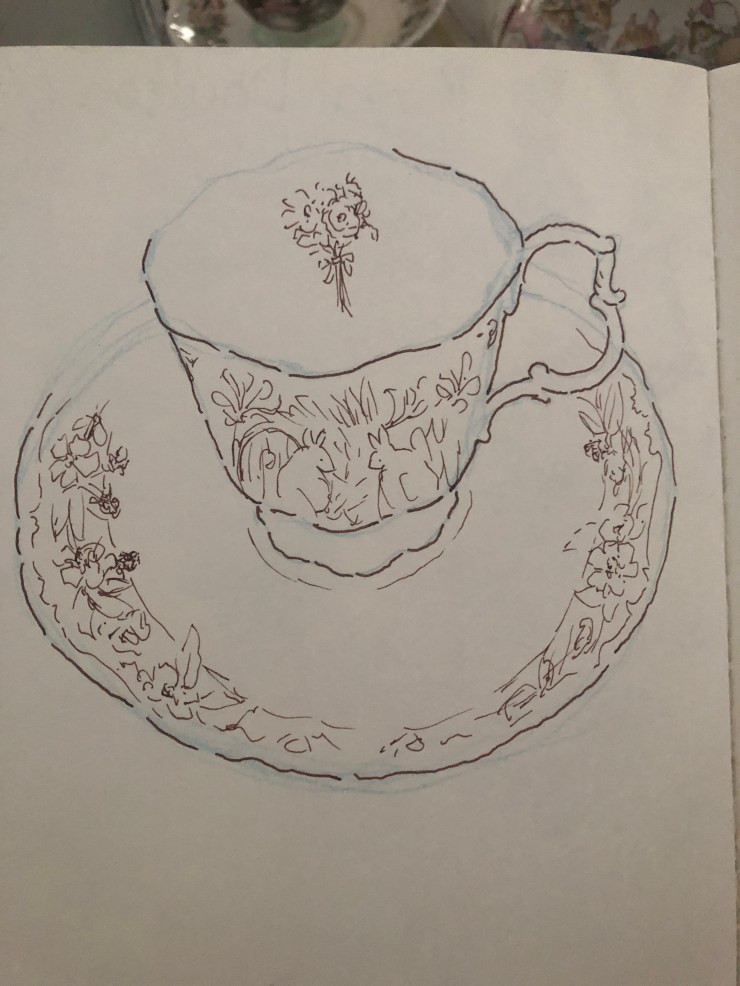
I also did a pen and ink study just for old kicks. This was how I first learned with Liz!
Lastly I painted a whole tea-set using the new techniques I learned. This was a goal I set for myself about halfway through the class. I used my new miniature Brambly Hedge tea-set. (It seemed a lot less intimidating than my full-sized one!)

And that was it! All done! The next week we were off to Memphis and Dollywood!
This class was so good and worth every penny! Plus, I have lifetime access which I understand means I can follow along again anytime she opens it up live in the future and I can revisit anytime. That’s so cool!!! I learned so much but the most important thing was to just go for it! Liz says to just accept the wonky ellipses (the ovals used to draw the rims and saucer) and keep going! (I had a hard time with that!) The forums and online support was AMAZING. There were all skill levels attending and everyone was so kind to everyone else. So many great and encouraging, uplifting comments. Plus a section with tea quotes and a section about what tea people liked and tips and tricks for tea. ( So much nerdy fun.) Overall I’m very proud of myself for sticking with it (my adhd side likes to quit things in the middle) and was very encouraged by the positivity of the community. I hope you have the opportunity to take the class the next time its open!!! Its worth it!

With tea and watercolor love to you from Kansas Street,
-Jaime

Hi Jamie,
I absolutely love your work from the class! Your teacups are beautiful, and you painted the details perfectly. I especially love your sketch in pencil, studying the light/shadow. I learned a lot from the class but I still have a ways to go. It looks like you picked it up quickly.
Kate
LikeLike